
iPhone newbies, we got you! We know that a new smartphone can be intimidating (all those apps!) and hard to navigate in the beginning. No fear, we’ve all been there. If you’re a rookie iPhone user (or iPad newbie – a lot of functions overlap), these tried and true photo tips will put you on the path to pro-status in no time.
Specify your focus.

Most smartphones automatically detect faces, but sometimes you want to change your picture’s focus. Simply tap the screen where you want the focal point to be, and a yellow square will appear (see above). This area will be in focus, and surroundings will be less sharp. Here, the flowers in the foreground are nice and crisp, and the foliage behind it is soft and blurred.
Pinch me, I can zoom
Zoom for maximum vrooom. Use your index finger and thumb to press down on the screen to zoom. Simply move your fingers away from each other, expanding the space between them. As your fingers expand, the screen will zoom in on your subject. To zoom out, move your fingers closer together, “pinching” in the screen. Note: Since the zoom feature is digital rather than optical, it leads to a loss in image quality. Zoom wisely!
It’s hip to be square
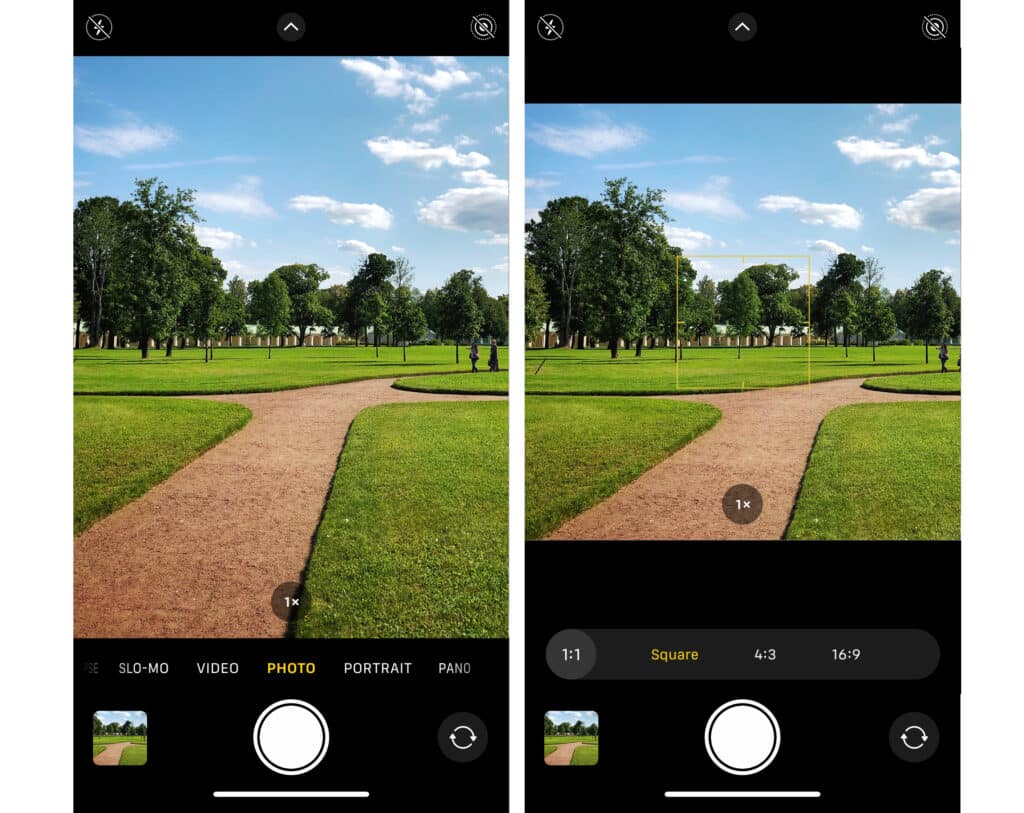
The iPhone app has a fashionable square shot mode that is reminiscent of photos taken by a 2-1/4″ x 2-1/4″ twin lens reflex (TLR) camera like the Rolleiflex. These cameras hark back to the first heyday of square photography between the 1940s and 1960s. Thanks to Instagram, the square format is again in vogue. Swipe to the square option and the shooting screen will change from a rectangle to a square. In the above photo, we decided that we didn’t need that much sky or greenery in the foreground, so we opted for the square frame. (Yes, you can just go in and crop the photo later, but the square option ensures that everything you want to see fits in the frame.)
Tap into HDR
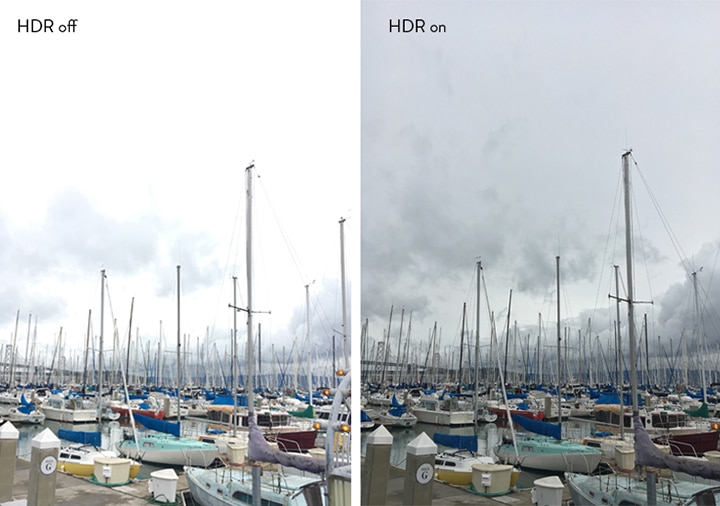
The best way to instantly improve the quality of your iPhone shots is using High Dynamic Range mode (HDR). In iPhones older than XS, you can select HDR (upper right of phone screen) when you’re shooting a subject in front of a strong light source. HDR involves taking a series of photos in rapid succession. The photos are combined into a single image that allows the details of both light and shadow to come through to reveal a crisp, detailed image. See how the sky in the left photo is blown out, but the sky and clouds in the right photo are much more defined?
Newer models of the iPhone (XS and above) have Smart HDR enabled, which automatically makes the adjustments found in HDR mode.
Use burst mode for continuous shooting
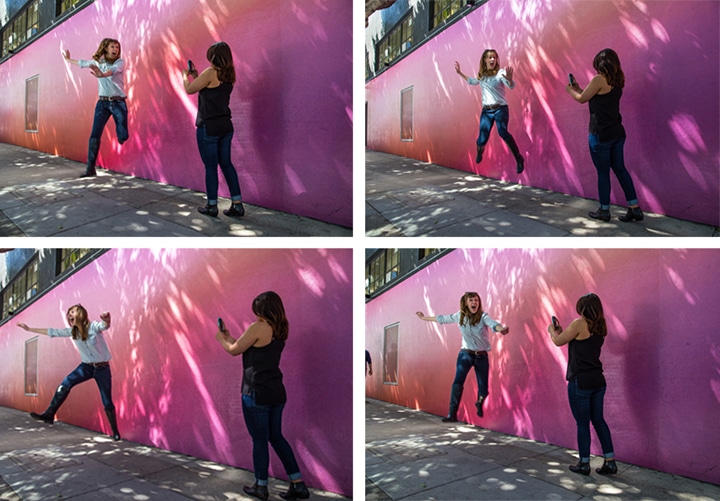
Burst Mode is a handy feature for taking action shots of your kid scoring a soccer goal or your dog running around the backyard. Hold down the shutter button to take 10 pictures every second or so, and release the shutter button when you’re done. Go into your Camera Roll and tap on the burst mode stack you want to view.
Some photos in the burst mode stacks will have grey dots underneath them. Your iPhone automatically chooses what photos it thinks are the best, making it easy to identify the sharpest image. Of course, you have the ultimate say in which photos you keep or delete. We had a lot of fun experimenting with this, if you couldn’t tell…
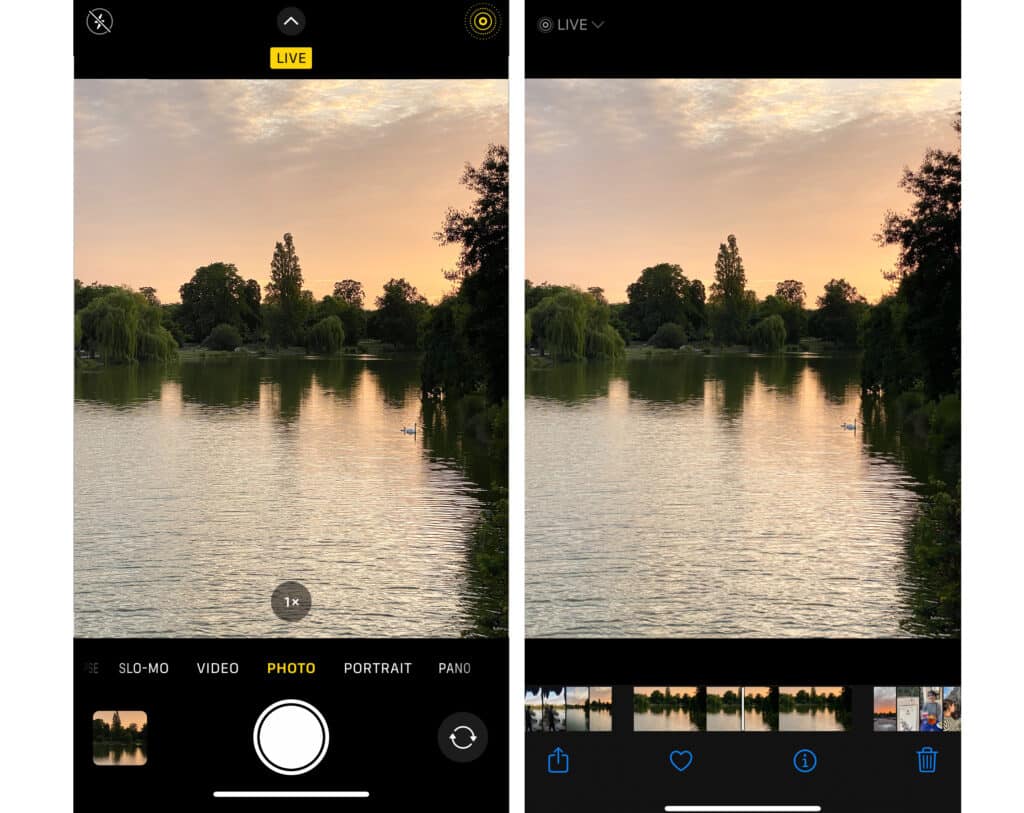
In newer models of the iPhone (XS and above), enabling live photos does the same as burst mode. Expand the live photo to choose an individual frame.
Get on the Grid

The iPhone has a cool Grid Mode that can help better frame people, pets, horizons – any subject, really. Turn this feature on in your phone’s Settings. Select Photos & Camera and turn on the Grid option to reveal white line guides. Place points of interest at the intersections of the white line, effectively ensuring your photo adheres to the Rules of Thirds. By following this rule, your photos will be instantly balanced. In this photo, the Bay Bridge is positioned in the second and third panes of the frame, rather than spanning across the photos.

Brilliant job – you’ve officially graduated from iPhoneography 101! Now, bring your photos to life as Wall art, Photo Books, or Prints!
Originally published by Nan Choate on Snapfish US
What did you create on Snapfish? Share it with us on social media! You can tag us with @snapfishuk in your photos on Instagram or Facebook or use the hashtag #snapfishuk. Don’t forget to follow us on YouTube, Twitter and Pinterest, too. We love seeing what you create.